Synchronizing Prior Months
In this guide, you’ll find:
- How to sync data from previous months into the current record with the Quickbooks Sync app.
Introduction
The Quickbooks Sync app allows you to sync data from previous months into the current records, through a short process
Key Details
Syncing Process
Step One
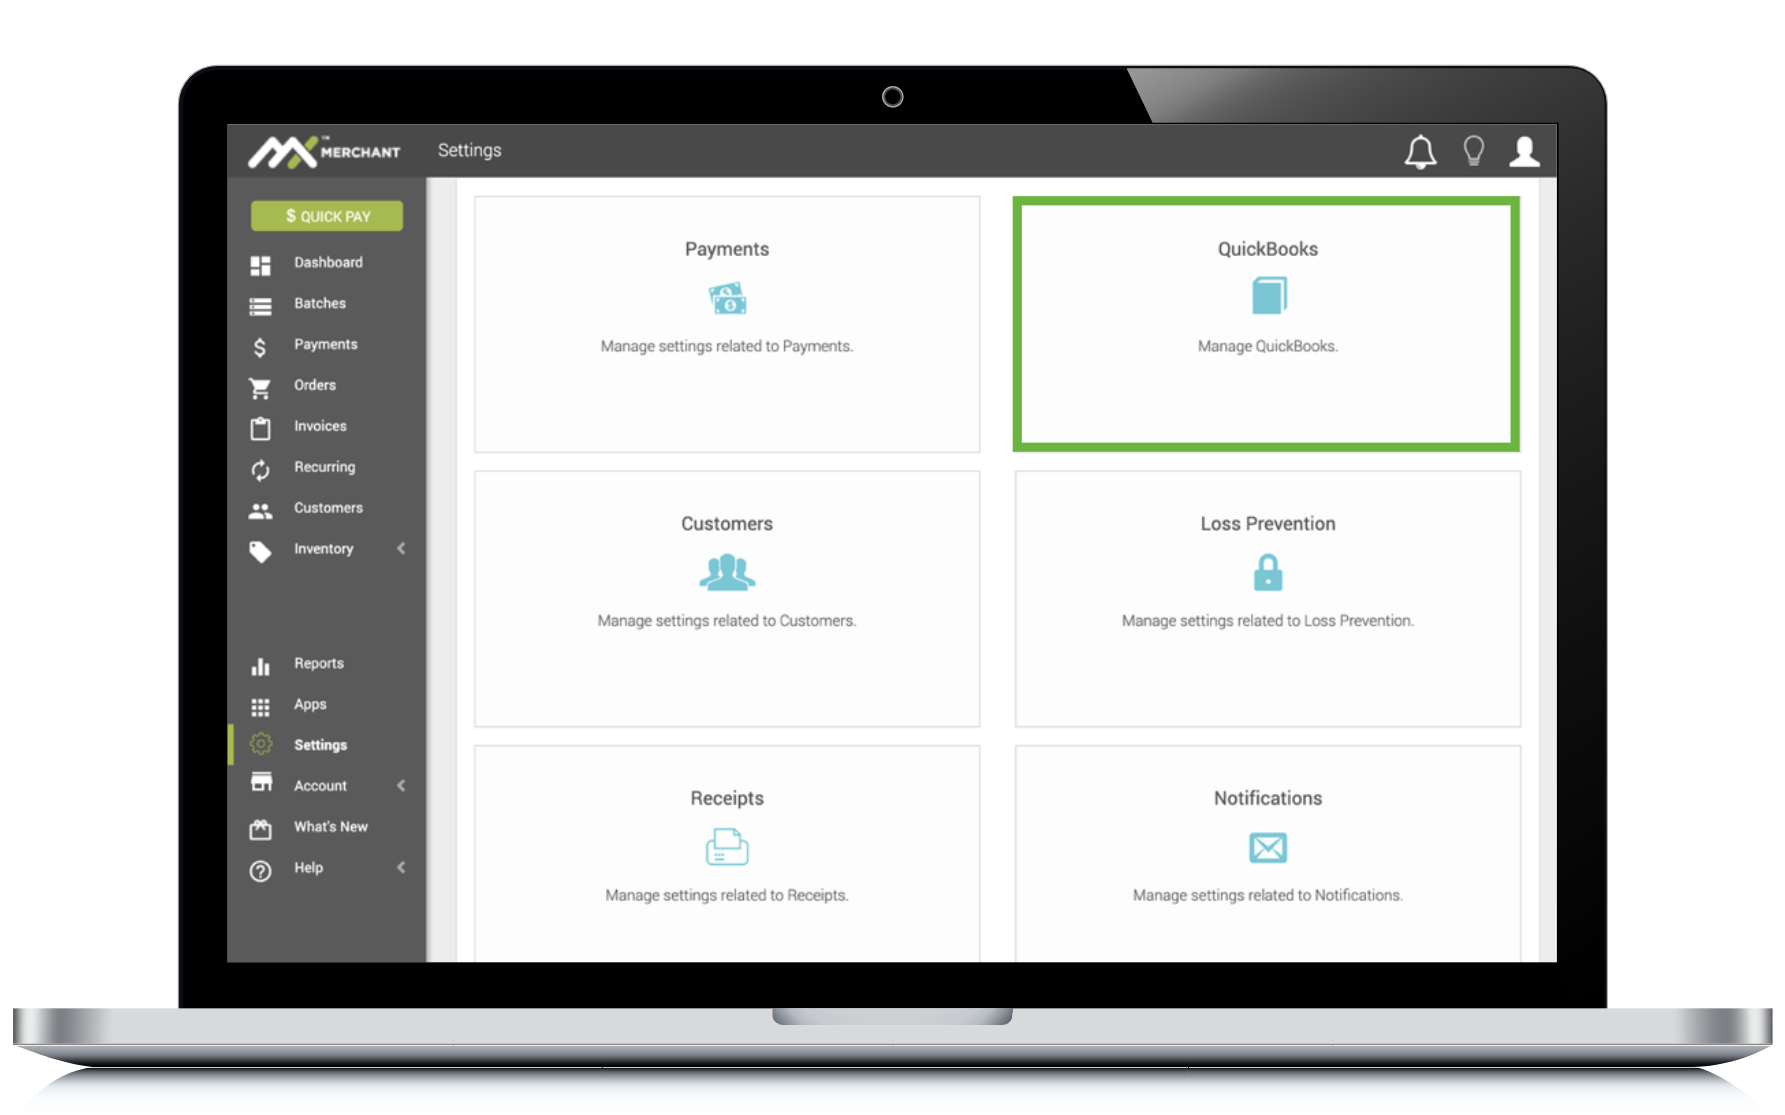
Historical data or prior months may be synchronized via the Settings found on the left-hand navigation within MX™ Merchant.
To start this process, click Settings, then QuickBooks.
Please note:
- Only historical months containing payments or invoices are made available to select for synchronization.
- Syncing prior months may take several hours.
Step Two
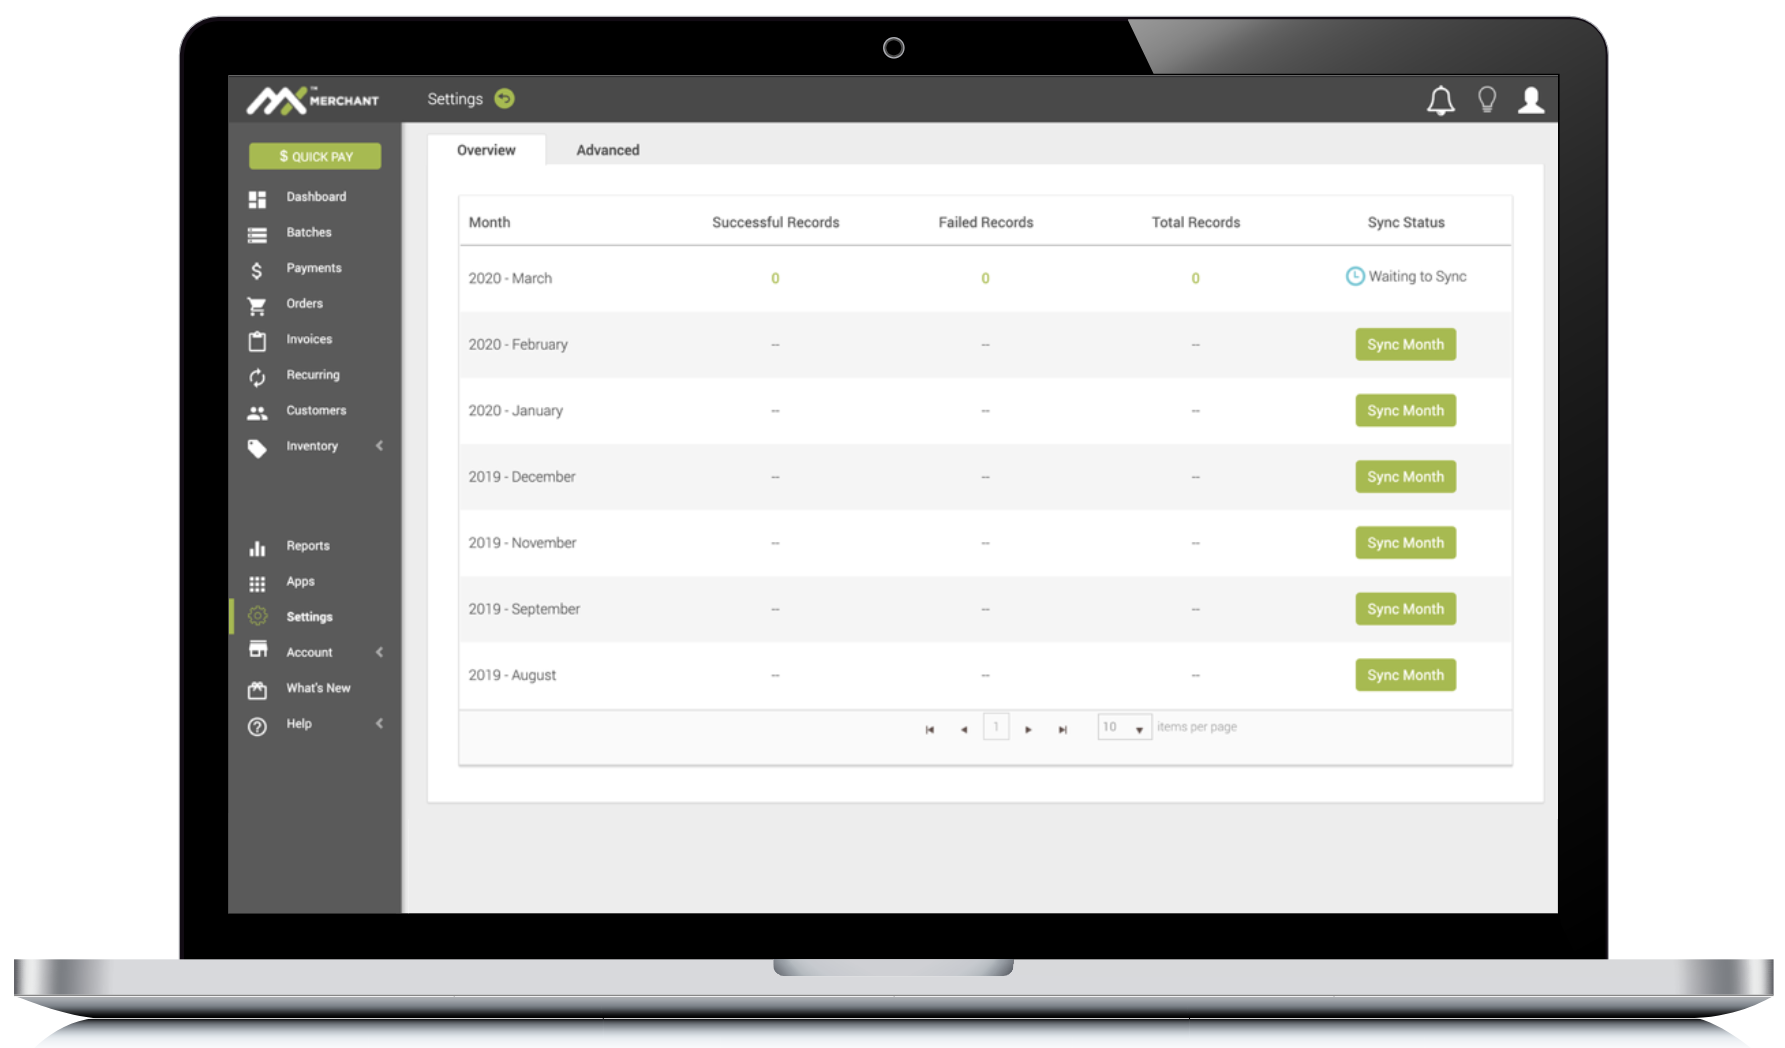
Next, you will see a list of months available for synchronization.
To sync a prior month:
- Select Sync Month and the prompt shown (above) will be displayed.
- Click Accept to agree to the synchronization and any applicable fee.
Step Three
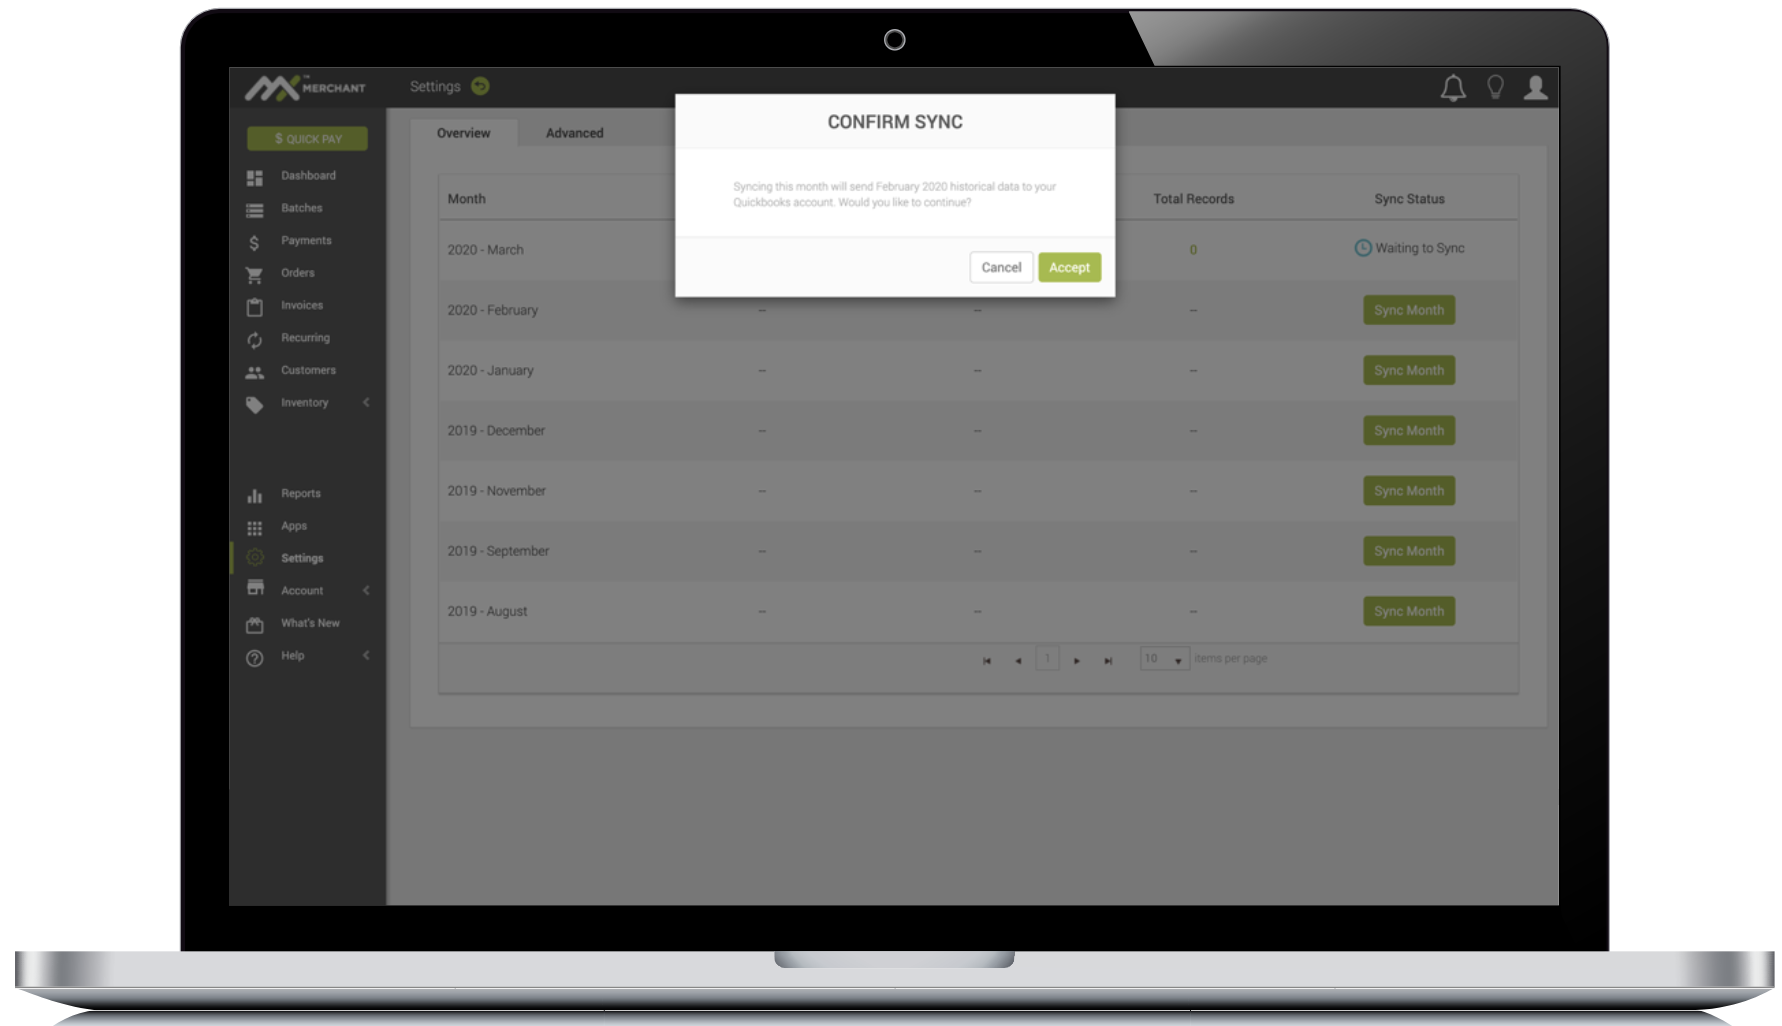
The status for the month selected will change to Waiting to Sync, and will begin to synchronize once it is queued for processing.
Additional Resources
Videos
- MX™ QuickBooks Sync - Syncing Prior Months: Instruction Video