Notifications
Introduction
Notifications are a great way to keep a close eye on your business without the time-consuming reports and constant account checking. Use notifications to keep you in the loop while you continue to manage what is important to you and your business.
What You'll See
Upon Entering the Notification settings page, each notification is shown with the following information; you'll find more information about each of these features in the sections below:
- Id - System-generated identification number.
- Event - Event that triggers the notification
- When - The instance in which the notification should be triggered.
- Action - Selected notification sending method (or methods).
- Created - Date and time stamp of when the notification was created.
- Modified - Date and time stamp of the last time that changes were made to the notification. If none have been made yet, the created and modified date will be the same.
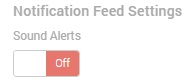
In addition, you'll find this button that will allow you to enable or disable sound alerts for the notifications that you receive. Set it to On to enable them, or Off to disable them.
Key Details
Adding a Notification
- To add a new notification, click + Add Notification in the upper right of the Notification settings screen.
- A pop up will appear where you will need to choose your notification event types. Read more on each type below to help make your selection.
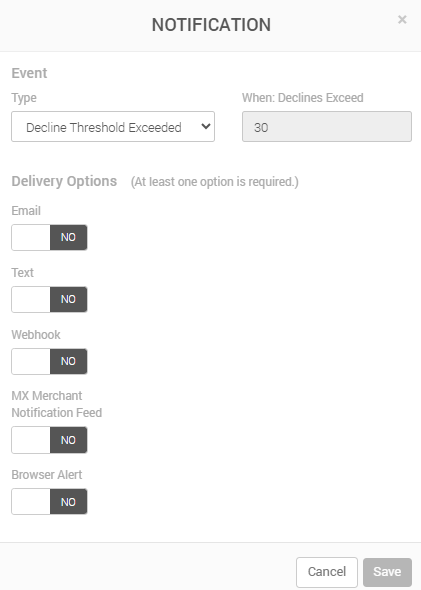
- Choose at least one of the following Delivery Options:
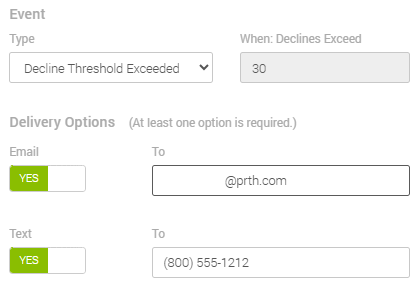
- Email - Email address.
- Text - Phone number for receiving SMS text messages.
- Webhook - Email address previously enabled for receiving notifications through webhooks.
- MX Merchant Notification Feed - Notifications will be logged in the notification feed.
- Browser Alert - Notifications will pop up in your browser.
- Once you have set it up, click Save.
Notification Types
There are 12 different notification types that are available to choose from: Decline Threshold Exceeded, Decline Threshold Warning, PCI Expiration, Batch Closed, Chargeback, Decline, Deposit, Payment, Refund, Expired Card, New Statement, Open Batch and Close Batch. Learn more about each one in the sections below.
Decline Threshold Exceeded
These notifications tell you when the decline threshold is about to be reached, so you can react to the problem on time.
- Choose the Type: Decline Threshold Exceeded.
- In When: Declines Reach, you will see the number the number of declines that need to occur in a single day for you to be notified. Because of a setting done on MX™ Connect, MX™ Merchant will put in 30 by default, and it can't be modified in this section.
- Choose at least one of the Delivery Options, and enter the desired contact information.
- Click Save.
Decline Threshold Warning
These notifications tell you when the decline threshold is about to be reached, so you can react to the problem on time.
- Choose the Type: Decline Threshold Warning.
- In When: Declines Reach, you will see the number the number of declines that need to occur in a single day for you to be notified. Because of a setting done on MX™ Connect, MX™ Merchant will put in 28 by default, and it can't be modified in this section.
- Choose at least one of the Delivery Options, and enter the desired contact information.
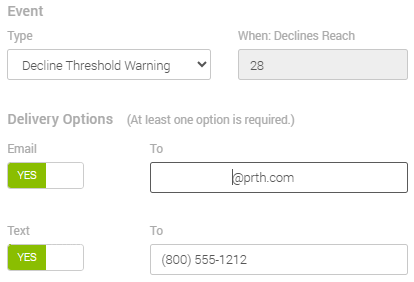
- Click Save.
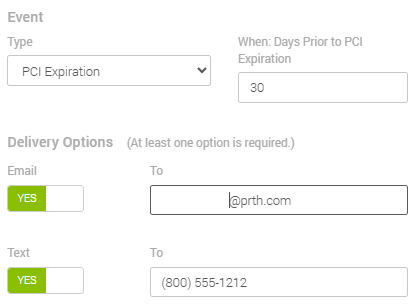
PCI Expiration
PCI expiration notifications help better meet payment industry standards, and thus avoid non-compliance fees.
-
Choose the Type: PCI Expiration.
-
In When: Days Prior to PCI Expiration, enter the number of days in in advance of the expiration of your SAQ you would like to be notified. MX™ Merchant will put in 30 by default.
-
Choose at least one of the Delivery Options, and enter the desired contact information.
-
Click Save.
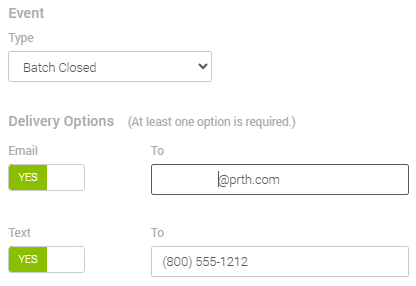
Batch Closed
Batch close notifications can help you guarantee that batches are closed on time.
-
Choose the Type: Batch Closed.
-
Choose at least one of the Delivery Options, and enter the desired contact information.
-
Click Save.
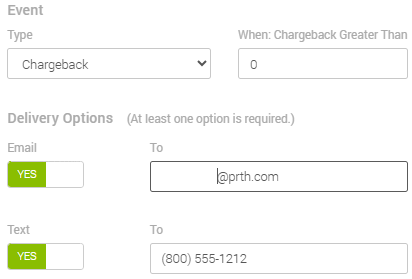
Chargeback
Chargeback notifications allow you to know immediately when a chargeback is performed, so it can be addressed appropriately.
-
Choose the Type: Chargeback.
-
In When: Chargeback Greater Than, enter the minimum chargeback amount at which you would like to be notified. MX™ Merchant will put in 0 by default, meaning that any chargeback, even one for $0.01, would be immediately reported.
-
Choose at least one of the Delivery Options, and enter the desired contact information.
-
Click Save.
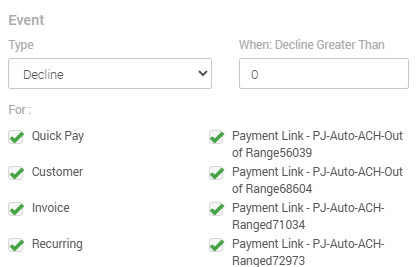
Decline
Decline notifications help you avoid the decline limit, by telling you when you may be approaching it.
-
Choose the Type: Decline.
-
In When: Decline Greater Than, enter the minimum declined amount at which you would like to be notified. MX™ Merchant will put in 0 by default, meaning that any declined amount will be reported.
In the For section, you will find several sources in which a decline could generate, including Quick Pay, Invoice, MX Express, MX Retail, payment links, among others. Choose at least one of them. -
Choose at least one of the Delivery Options, and enter the desired contact information.
-
Click Save.
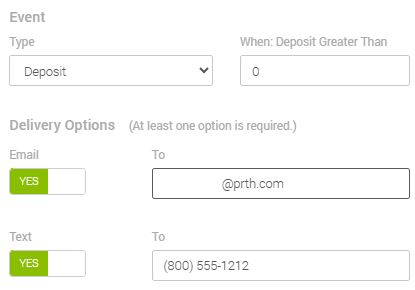
Deposit
Deposit notifications allow you to know immediately when a deposit has reached your account.
-
Choose the Type: Deposit.
-
In When: Deposit Greater Than, enter the minimum deposit amount at which you would like to be notified. MX™ Merchant will put in 0 by default, meaning that any deposit will be immediately reported.
-
Choose at least one of the Delivery Options, and enter the desired contact information.
-
Click Save.
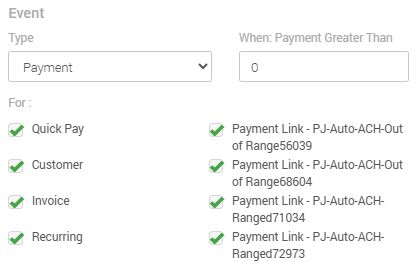
Payment
Payment notifications are very common, since they simply notify you of any payment run through MX Merchant.
-
Choose the Type: Payment.
-
In When: Payment Greater Than, enter the minimum payment amount at which you would like to be notified. MX™ Merchant will put in 0 by default, meaning that any declined amount will be reported.
-
In the For section, you will find several sources in which a payment could generate, including Quick Pay, Invoice, MX Express, MX Retail, payment links, among others. Choose at least one of them.
-
Choose at least one of the Delivery Options, and enter the desired contact information.
-
Click Save.
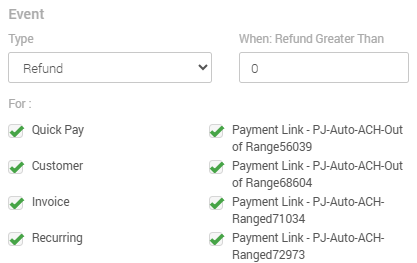
Refund
Payment notifications are can help you detect refunds, especially large ones, to address them appropriately.
-
Choose the Type: Refund.
-
In When: Refund Greater Than, enter the minimum refunded amount at which you would like to be notified. MX™ Merchant will put in 0 by default, meaning that any refund amount will be reported.
-
In the For section, you will find several sources in which a payment could generate, including Quick Pay, Invoice, MX Express, MX Retail, payment links, among others. Choose at least one of them.
-
Choose at least one of the Delivery Options, and enter the desired contact information.
-
Click Save.
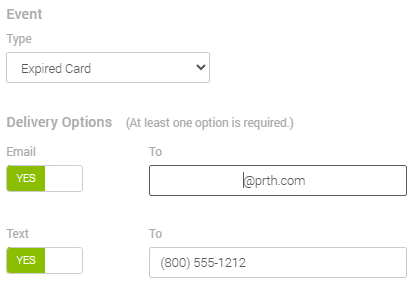
Expired Card
Expired card notifications will help you keep track of registered debit and credit cards that have expired.
-
Choose the Type: Expired Card.
-
Choose at least one of the Delivery Options, and enter the desired contact information.
-
Click Save.
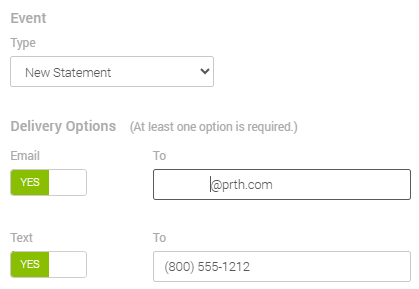
New Statement
New Statement notifications will tell you when a statement is available for view, which will save you time checking.
-
Choose the Type: New statement.
-
Choose at least one of the Delivery Options, and enter the desired contact information.
-
Click Save.
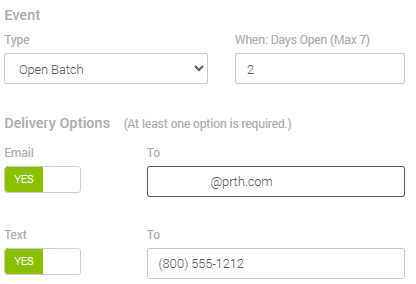
Open Batch
Open batch notifications allow you to know immediately when a deposit has reached your account.
-
Choose the Type: Open Batch.
-
In When: Days Open (Max 7), enter the number of day that a match needs to be open for you to be notified. MX™ Merchant will put in 2 by default. You may only type numbers up to 7.
-
Choose at least one of the Delivery Options, and enter the desired contact information.
-
Click Save.
Old Documentation
Overview
Notifications are a way our clients can easily get updates on events for their merchants. Event notifications are tied to the merchant ID
Events
Events that you can be notified of include the following:
- Chargebacks
- Deposits
- Successful Payments
- Failed Payments
- Upcoming SAQ Expiration
- Refund Created
- New Statement
- Batch Closed
- Expired Card
Note: Only 1 event can be set up at a time through the API. For example, If you are setting up a notification event for "Chargebacks" and "Deposits" to be sent via SMS, Email, and Webhook, you need to set up the "Chargeback" event, and then the "Deposits" event separately.
Where to send notifications
Notifications can be sent to:
- SMS
- Webhook
You can choose to have notifications sent to as many of these as you desire, or simply just one of them. When setting up via API there are two steps you need to take for each to function. They need to be set to "true" and they need to be provided with an endpoint to send the notification.
Example:
{
     "sendEmail": true,
     "emailAddress": "[email protected]",
     "sendSMS": true,
     "phoneNumber": "1112223344",
     "sendWebhook": true,
     "callbackUrl": "webhookendpoint.com"
}
Sources
Sources identify from which payment points do you want notifications to be sent. For example, if you want to be notified of declines that come from API requests, Quickpay, and Recurring, you can specify that using the "Sources"
"sources": "QuickPay, API, Recurring"
Terminals
Terminals, while not being listed as a "source" are still able to be used as a method for sending notifications. Terminals are configured to make their payments as an API call, so if you have API enabled as a source, your terminal payments will also trigger notification events. Terminals can also be used as Quick Pay in our MXM UI, so be sure to enable Quick Pay as well to ensure you receive all of your notifications when using a terminal.
Creating the Notification Event
Events need to be created before notifications can start being received. Once set up, you are good to go. The setup is a PUT using the following endpoint:
Sandbox: https://sandbox.api.mxmerchant.com/checkout/v3/subscription
Production: https://api.mxmerchant.com/checkout/v3/subscription
{
     "sendEmail": true,
     "emailAddress": "[email protected]",
     "sendSMS": true,
     "phoneNumber": "1112223344",
     "sendWebhook": true,
     "callbackUrl": "webhookendpoint.com",
     "sources": "QuickPay, API, Recurring",
     "merchantId": 10001291238,
     "threshold": 0
}
After it is set up, notifications will start being sent based on the parameters you have set.
Get Notifications
This endpoint is used to get notification details:
Sandbox: https://sandbox.api.mxmerchant.com/checkout/v3/subscription
Production: https://api.mxmerchant.com/checkout/v3/subscription
This is a GET request that will pull all notifications sent based on the Merchant ID. Users can limit how many responses they view, and which notification they wish to begin with in the call.
{
"echo": true,
"merchantId": "100012913281",
"limit": 50,
"offset": 10
}