Quick Pay
In this guide, you’ll find:
-
How to initiate and configure a Quick Pay transaction.
-
How to use advanced and Level 3 data fields for more detailed payments.
-
How to vault a card for future use.
-
How to process different types of payments: card, cash, check, and ACH.
-
How to issue refunds on new and existing transactions.
-
How to interpret transaction results and provide receipts.
Introduction
Quick Pay transactions live up to their name: they are quick and require little detail in order to process the payment. You can use Quick Pay for card, cash, check, and ACH transactions.
What You'll See
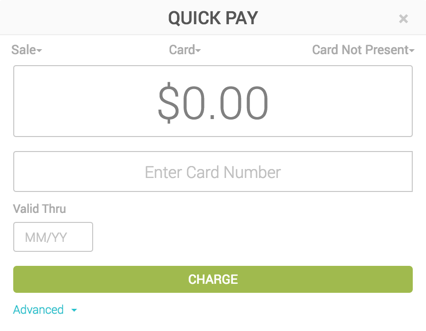
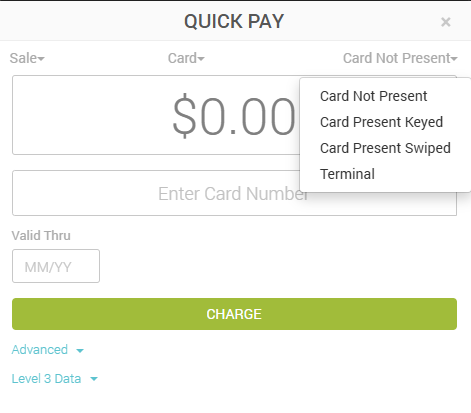
To start a Quick Pay transaction, click the Quick Pay button in the left-hand menu. This will cause a small pop-up window to show up.

Across the top, you'll find a few dropdown options with the default selection showing. To change them for the current transaction, click on the down arrows ▾ to the right of each word.
-
Type of sale - Sale or Refund (defaults to Sale).
-
Tender type - Card, Cash or Check (defaults to Card).
-
Presence type
- For Card payments: Card Not Present, Card Present Keyed, Card Present Swiped or Terminal.
Please note:
- The Tender type and Presence type of will determine the fields available to process the payment.
- Default values different from the one shown above can be set on Payment settings.
You may also click the Advanced option at the bottom to access additional data fields that can be added to the payment.
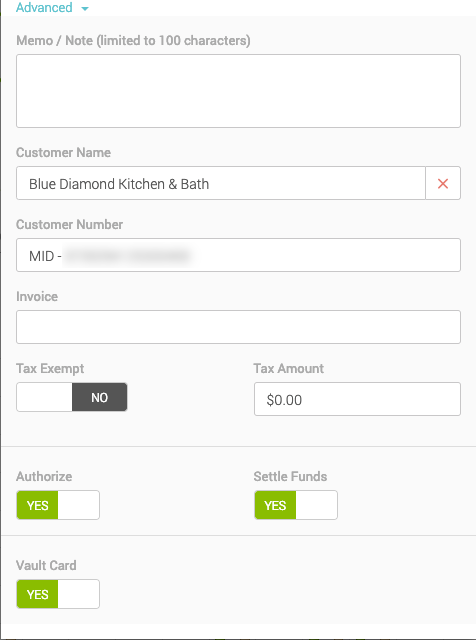
Now you will see the pop-up has expanded with the following fields:
-
Memo / Note – Free form text box.
-
Customer Name – Allows you to either search for a customer here or enter a new customer name. If a customer name is entered that does not already exist, a new record will be created for them.
-
Customer Number – Allows you to either search for an existing customer by customer number or use this field to enter your own unique number.
-
Invoice – Allows you to enter your own invoice number for this payment.
-
Tax Exempt - Indicates whether the transaction is tax exempt (defaults to No).
-
Tax Amount – Allows you to enter how much of the total above is tax. If nothing is entered, the system will default to 7% for reporting purposes only to help you qualify for the best rate.
-
Authorize – If toggle to No, a field is displayed to enter an offline authorization code.
-
Settle Funds – If toggle to Yes, it will add funds to the day’s settlement. If toggled to No, it does not add funds to the day’s settlement. This option is not available to Clerks.
-
Vault Card – If toggled to Yes, card information will be saved. If toggled to No, card information will not be saved. Only the last four digits of the card will be displayed. You can learn more about vaulting a card during a QuickPay transaction in the section Vaulting a Card with Quick Pay.
Please note:
- All fields in the Advanced section are optional.
- The Authorize option is not available to clerks.
- If Tax Exempt is set to Yes, Tax Amount will no longer show up.
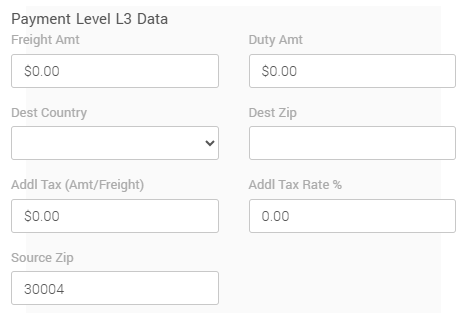
If you need to enter even more deailed information, after pressing Advanced, you may press Level 3 Data on the bottom left-hand corner. You will find the following fields, which, as in the case of those in the Advanced section, are fully optional:
-
Payment Level 3 Data
- Freight Amt: The cost of shipping or transportation for the order.
- Duty Amt: The total customs duty charged on the shipment.
- Dest Country: The destination country where the order is being shipped.
- Dest Zip: The postal code of the destination address.
- Addl Tax (Amt/Freight): Any additional tax amount applied to the freight cost.
- Addl Tax Rate %: The percentage rate of the additional tax applied.
- Source Zip: The postal code of the location where the order is shipped from.
-
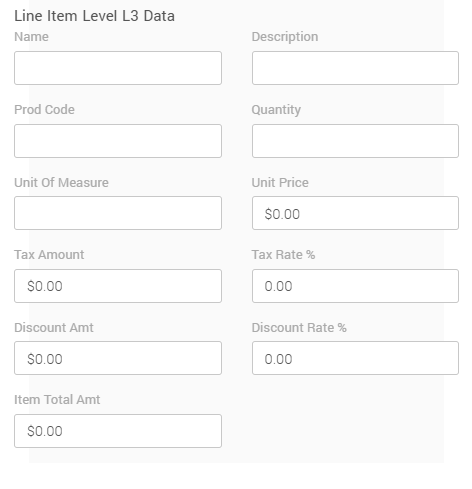
Line Item Level 3 Data
- Item Name: The name of the product being purchased.
- Item Description: A detailed description of the product.
- Prod Code: A unique identifier or SKU for the product.
- Quantity: The number of units of the product being purchased.
- Unit Of Measure: The measurement unit for the product (e.g., pieces, kg, liters).
- Unit Price: The cost per unit of the product.
- Tax Amount: The total tax amount applied to the product.
- Tax Rate %: The percentage of tax applied to the product price.
- Discount Amt: The total discount applied to the product.
- Discount Rate %: The percentage discount applied to the product price.
- Item Total Amt: The final total amount for the item after applying taxes and discounts.
Key Details
Vaulting a Card with Quick Pay

As mentioned above, in order for the card information to be saved, the Vault Card field must be toggled to Yes. Otherwise, you'll have to reenter the information manually on the next payment.
Processing A Sale
Card Sales
To process a card sale, follow these steps:
-
Select the payment type Sale.
-
Select the payment method Card.
-
Select the appropriate card presence setting: Card Not Present, Card Present Keyed, Card Present Swiped, or Terminal.
-
Enter the total dollar amount to charge the customer.
-
Swipe or key in the card number.
-
If terminal is chosen, press the Request payment button
Please note:
If the Last 4 digits of the credit card number option is selected in the Loss Prevention settings for swiped transactions, there will be a prompt to enter the last four digits of the card.
-
Click Advanced if you wish to enter additional information.
-
Click Charge.
Cash Sales
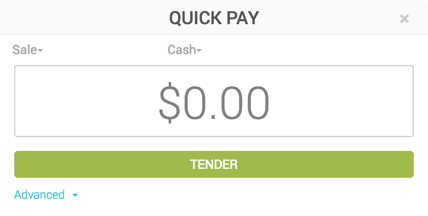
To process a cash sale, follow these steps:
-
Select the payment type Sale.
-
Select the payment method Cash.
-
Enter the total dollar amount to charge the customer.
-
Click Tender.
Check Sales
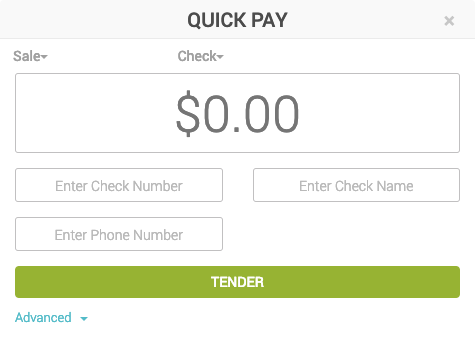
To process a check sale, follow these steps:
-
Select the payment type Sale.
-
Select the payment method Check.
-
Enter the total dollar amount to charge the customer.
-
Enter the name on the check.
-
Enter the phone number and check number if prompted due to Loss Prevention settings.
-
Click Tender.
Refunds
New Refunds
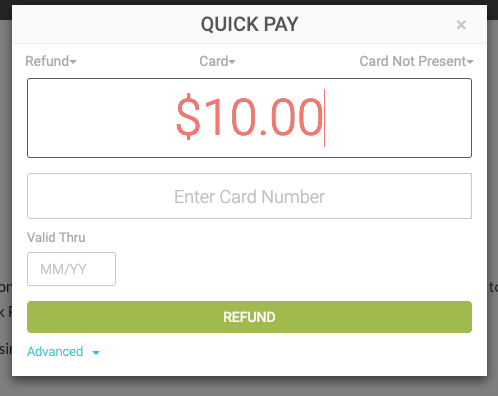
To process a new refund, follow these steps:
-
Click the Quick Pay button on the left menu.
-
Select payment type: Refund (Top).
-
Select payment method: Card, Cash, or Check (Top).
-
Select the payment type Refund.
-
Select the payment method Card, Cash or Check.
-
If the selected payment method is Card, select the presence type: : Card Not Present, Card Present Keyed, Card Present Swiped or Terminal.
-
Enter the amount to refund.
-
Click Refund or Swipe Card.
Refunds on Existing Payments
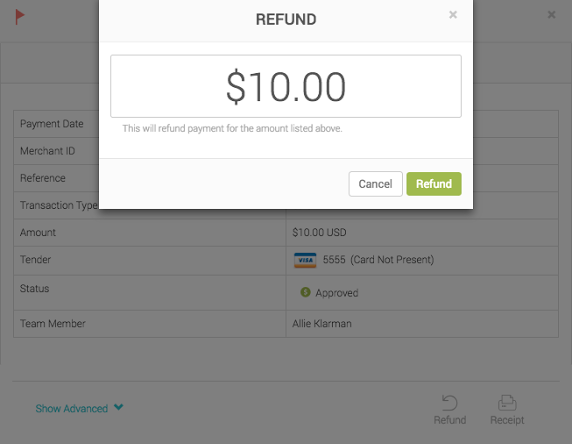
To process a refund on an existing payment, follow these steps:
-
On the MX™ Merchant main page, click Payments on the left-hand menu.
-
Locate the original sale on the payment list.
-
Click the reference number (in green) for the sale that you want to refund.
-
At the bottom right of the pop-up window, click Void.
-
Enter in the refund amount in the pop-up window.
Please note:
The refund amount must be equal to or less than the sale amount.
- Select the refund button in the bottom right of the pop-up
Approved or Declined
Once you click Charge, a pop-up will be displayed showing the status of the transaction: Approved or Declined. An approved transaction allows for a receipt to be sent via email and text or printed. A declined transaction gives the option to try running the payment again.
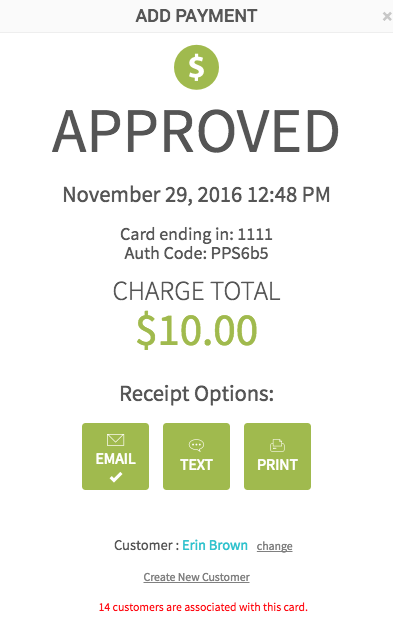
After you click either Charge or Tender, and see the image above, this tells you that the payment was processed successfully. Now, you can choose how you would like to provide a receipt to the customer.
Receipt options can be found in the green boxes toward the bottom of the pop-up. Depending on what the customer prefers, select the corresponding box:
-
Email - will require you to enter or select an email address.
-
Text - will require you to enter or select a phone number.
-
Print - will open up in a new tab for you to select which printer you would like to print to.
-
No receipt - Click the X button on the upper right-hand corner of the pop-up window.
Please note:
A check on the tile means that there is either an email or phone number on file for this customer.
Here's a few more things to consider:
-
At the bottom of the pop-up, you will notice this is where you can confirm the customer in blue. You may also associate this payment with a customer if you did not do so in the Advanced section of Quick Pay before charging the card.
-
If it was a card transaction, MX™ Merchant will look at the card and compare to the card account vaults for your current customers. If it finds a match the payment will automatically be associated with that customer.
-
In some instances, customers may use other people's card, for instance, when a child customer uses their parents' card. In such cases, you can create a new customer or select from others associated with this card by clicking Change (in blue) to the right of the customer name.
-
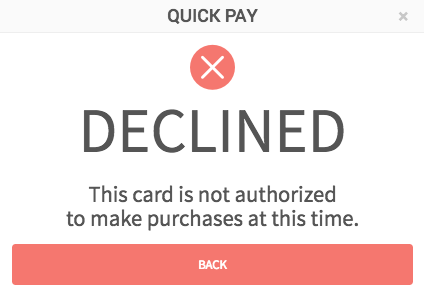
If you click either Charge or Tender and see the pop-up above, it means that there was something wrong with the payment. This could be any number of things:
-
Something was typed incorrectly on the payment screen
-
Insufficient funds on the card to cover the charge
-
A hold on the card (you may have seen this happen to your own card on vacation if the credit card company finds them suspicious)
These are a few of the many reasons a payment may be declined. If this happens, click Back at the bottom of the pop-up and try a different payment method, or try to run the card again.
-
Additional Resources
Videos
- Quick Pay: Instruction Video